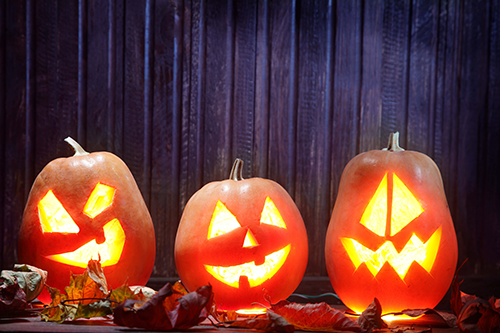
The Best-looking Jack-O’-Lanterns On The Block

By Christina Katz
1. Pick the prettiest. Large or small, you are looking for sturdy stems, no bruises, and pumpkins that sit pretty. Place the pumpkin on a counter and stoop down to see how it looks at eye level before you buy. Don’t carry them home by the stems because they break easily.
2. Timing is everything. The Internet is thick with tips for preserving pumpkins longer. Don’t try them. Simply carve your pumpkins 3-5 days before Halloween for a still-standing-tall guarantee.
3. Make cleanup a snap. The secret weapon for easy pumpkin-carving cleanup is probably out in your garage or shed. It’s a basic plastic tarp. Spread this time-saving savior inside on a cool day or outside on a warm day to contain your carving enthusiasm.
4. Use the proper tools. The best devices for carving jack O’lanterns don’t live in your kitchen drawers. Knives slip and spoons bend, so resist the urge to dip into your cutlery and instead purchase sturdy metal pumpkin scoops and kid-friendly carving saws you can use year after year.
5. Bigger is better. Enlarge designs for larger pumpkins. Use your home printer or stop by the local copy shop.
6. Start at the top. For large pumpkins, make the opening big enough for your hand and cut it at a 45-degree angle so the top will nest in place, instead of falling through.
7. Scrape, don’t dig. Don’t thin the walls of your pumpkin when scooping out the guts, so it will stay sturdy longer.
8. Draw it first. Freehand designs are cute and classic and young children love them. Use a medium-point washable marker to draw your design and then wipe away any remaining marks after carving.
9. Slit the paper. If you prefer to transfer a design and the pattern won’t wrap flat around your pumpkin, encourage it to cling by cutting a few up-and-down slits on the paper with an Xacto-knife prior to carving.
*10. Poke hole-patterns. If you’ve always wanted to attempt a tricky pattern, attach the design to your pumpkin with blue painter’s tape and poke shallow holes along the lines, just through the pumpkin’s skin with a thumbtack, skinny nail or hat pin. Then connect the dots with your carving saw to achieve whatever fancy look you like.
*11. Get your hand in there. Push carved pieces out from the inside with a finger. Go over delicate edges with a filet knife if pieces are stuck to avoid tearing pumpkin skin.
*12. Discard pulp outdoors. Do not put pulp into your garbage disposal. The place for pumpkin guts is your compost or yard clippings pile. Remove seeds for roasting and gently shake pulp off your plastic tarp before hosing it off and hanging it out to dry.
13. Keep jacks cool. In warm weather, keep carved pumpkins cool during the day. For longer-lasting displays, avoid direct sunlight. Display them at night and with battery-powered candles to avoid interior damage and fire hazards.
* Techniques for parents only, not young children.
How to Roast Perfect Pumpkin Seeds
As everyone is carving, offer a large bowl or pot for the pumpkin pulp. When the bowl is half full, loosen the seeds with your hands and fill pot to the three-quarters mark with water. The seeds will rise to the top.
Squeeze them through your fingers to remove any clinging pulp as you transfer them to a colander. Then spread them on paper towels and pat dry.
Set your oven for 325 degrees and transfer seeds to cookie sheets in single layers. Sprinkle each pan of seeds with one or two teaspoons of olive oil and a few generous shakes of salt.
Turn seeds with spatula every eight minutes until crispy on the outside and golden on the inside. Do not let seeds turn brown. Remove from oven, cool, and enjoy.
Store leftovers in an airtight container at room temperature for up to two months. If you have more seeds than you will eat, make pumpkin seed brittle or pumpkin seed trail mix to bring to Halloween parties as hostess gifts.
10 Playful Pumpkin Designs
A traditional jack-o’-lantern design is great. But why not branch out over the years? Here are few dramatic, yet easy designs for older kids and adults to try.
1. Holier than thou. Use a power drill to make holes all over the sides and top.
2. Wordy gourd. Try “Boo!” or “Eek!” to get started.
3. Fairy house village. Transform pumpkins of various sizes into a resort for magical creatures.
4. Cookie-cutter face. Gently hammer metal cutters into your pumpkin with a rubber mallet.
5. Diorama window. Cut a larger-than-usual opening to reveal a scene inside.
6. Core curriculum. Use an apple corer to cut wider, spaced-out holes.
7. Location identification. Put your house number pumpkin by the front door or mailbox.
8. Tower of grins. Stack squatty, multi-colored jacks on top of each other for a wow effect.
9. The monogrammed look. Carve one initial or up to three for a stately look.
10. Mum’s the pumpkin. Carve an opening on top for a pot of mums or flower bouquet.
Central California Parent is the #1 FREE parenting resource for Central Valley families.
Stay connected with Central California Parent throughout the month!
• Like Us on Facebook
• Follow Us on Instagram
• Follow Us on Pinterest
• Follow Us on Twitter
• Subscribe For our Family E-Newsletter
• Read Our Digital Edition
• Enter for our FREE Giveaways


